Español
  Français
  Deutsch
  Italiano
  Português
  Türkçe


How To Install an eSIM on Android
Checklist Before You Get Started
• Please make sure that you have an eSIM-compatible smartphone
• Stay connected to a stable Wi-Fi network to ensure a successful installation when activating the eSIM on your smartphone
• For website orders only: Please check the PDF you received via email. At the bottom, you will find a fine print indicating one of the following scenarios:
Scenario #1: Your eSIM can be installed without affecting its validity.
In that case, you can proceed to the section Add eSIM
Scenario #2: The validity of the eSIM starts running once it is installed.
In this case, we recommend installing it one day before or on the day of your departure to your travel destination. Alternatively, you can install the eSIM after you arrive. If you prefer to install it beforehand without activating it, proceed to the section Install the eSIM without Activation.
The steps below may slightly differ depending on the model & carrier. If you encounter any issues or have questions on how to install the eSIM, please contact our customer support
Install the eSIM without Activation
If you wish to install the eSIM without affecting its validity, follow the steps below. Please be careful throughout the whole process.
1. Turn ON Airplane Mode and connect to a Private WiFi Network
2. Download the eSIM
2.1 Scan QR Code as described in Step 1
2.2 Manually download the eSIM as described in Step 2
3. Once successfully installed, switch OFF the eSIM
4. You can turn OFF the Airplane Mode again
5. eSIM is installed & not activated
Once you arrive at your destination, you can simply turn on the eSIM and it will connect to the local network.
1. Add eSIM
1. Go to Settings on your device
2. Tap on Network & Internet
3. Tap the + icon next to Mobile Network
4. Tap Next when asked Don’t have a SIM Card?
5. Scan the eSIM QR code provided in the PDF file that is attached in the order confirmation email
Google Pixel
(1) Go to Settings and tap on Network & Internet
(2) Tap the + icon next to Mobile Network
(3) Tap on Download a SIM instead
(4) Tap on Next
(5) Use the Camera to scan the QR code
(6) Activate eSIM
Samsung
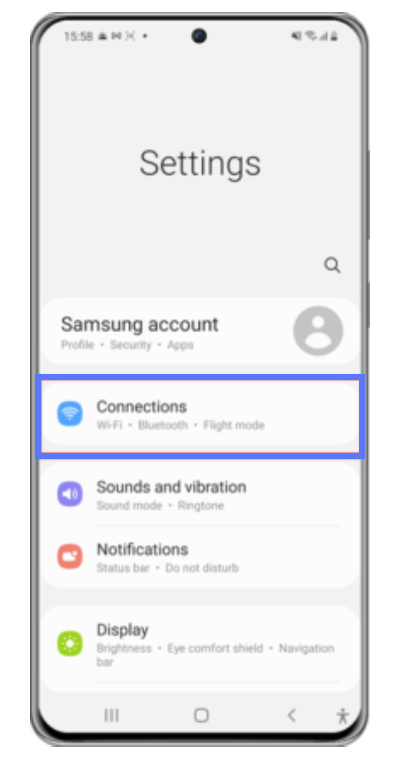
(1) Go to Settings and tap on Connections
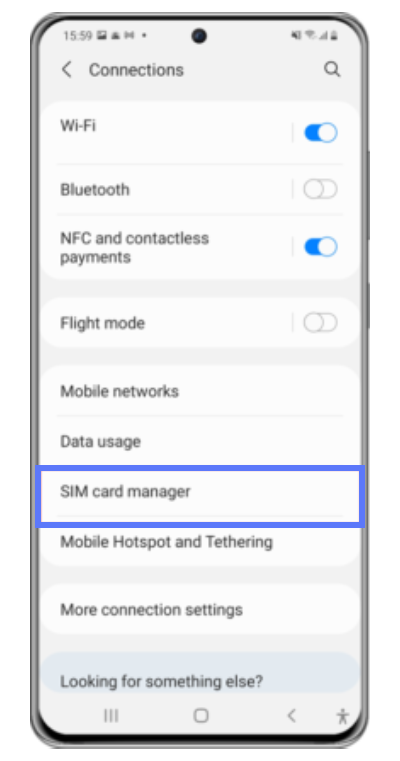
(2) Tap on SIM Card Manager
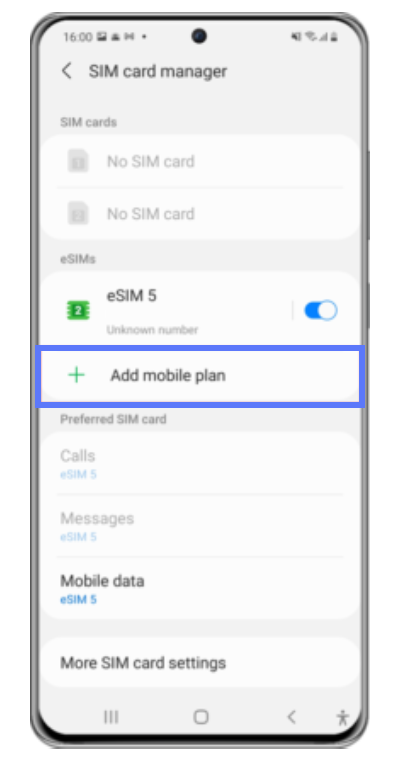
(3) Tap on Add Mobile Plan
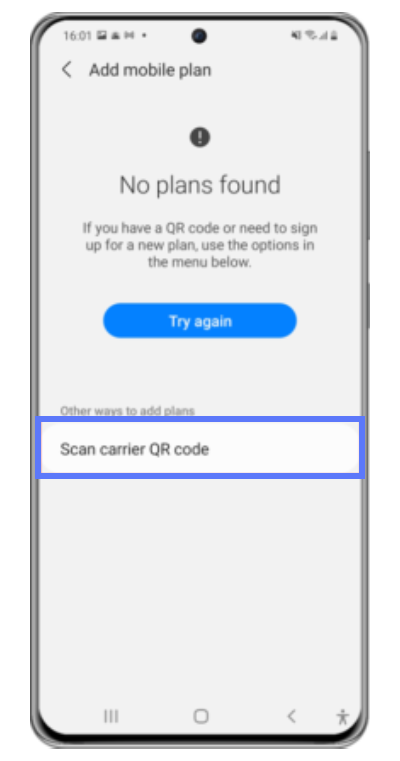
(4) Tap on Scan Carrier QR Code
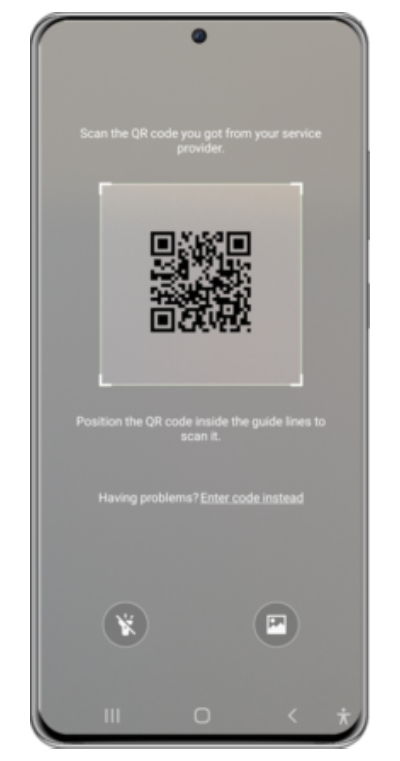
(5) Use the Camera to scan the QR code
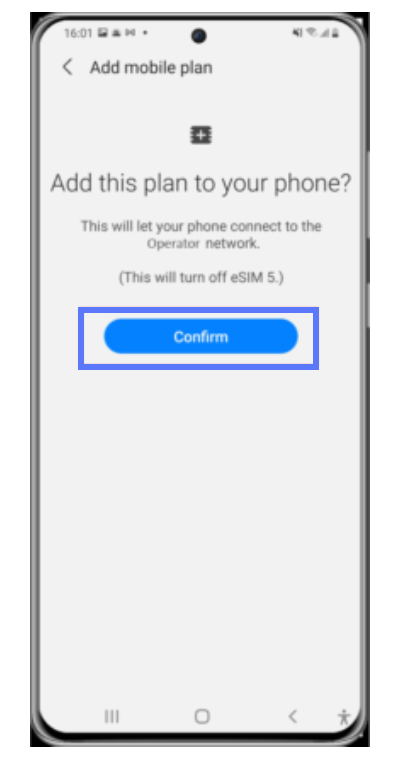
(6) Tap on Confirm
Alternatively, most Android smartphones do support scanning QR codes via the Camera app.
1. Open your Camera or a QR Scanner app
2. Scan the eSIM QR code provided in the PDF file that is attached in the order confirmation email
3. When the notification Cellular Plan Detected pops up, tap on it.
4. Tap on Continue at the bottom of your screen
5. Add Cellular Plan
2. QR Code not working?
If you cannot scan the QR code, you can enter the eSIM manually. You will find all necessary information (SM-DP+ Address & Activation Code) in the PDF file that is attached in the order confirmation email.
1. Go to Settings on your device
2. Tap on Network & Internet
3. Tap the + icon next to Mobile Network
4. Tap Next when asked Don’t have a SIM card?
5. Tab Enter Code Manually. You will be asked to enter:
5.1 SM-DP+ Address
5.2 Activation Code
5.3 You will need to enter the code with the following format: LPA:1$SDMP+ADDRESS$ACTIVATION_CODE
Do not forget to enable mobile data. Once you’ve landed at your destination, please turn off your primary default line to avoid any unnecessary roaming charges.
Google Pixel
(1) Go to Settings and tap on Network & Internet
(2) Tap the + icon next to Mobile Network
(3) Tap on Download a SIM instead
(4) Tap on Next
(5) Tap on Need help?
(6) Tap on Enter Data Manually. Enter the SM-DP+ Address & Activation Code
Samsung
(1) Go to Settings and tap on Connections
(2) Tap on SIM Card Manager
(3) Tap on Add Mobile Plan
(4) Tap on Scan Carrier QR Code

(5) Tap on Enter Code Instead. Enter the SM-DP+ Address & Activation Code
(6) Tap on Confirm
3. Change the APN settings
Some eSIM data plans might require you to change the APN settings. If needed, you will find all information in the PDF file that is attached in the order confirmation email.
1. Go to Settings
2. Tap on Mobile Networks
3. Select your eSIM data plan
4. Tap on Access Point Names
5. Tap on Mobile Data Network
6. Change the APN name as required. Other fields are optional